Since the end of 2021, I’ve been thinking about designing a bike that will be partly 3D printed. This project idea came to me after I came across a video of a cyclist who built his own bike with the help of 3D printing. I thought to myself, I’ve got to make my own bike, because I’ve always been a bike enthusiast and I own a printer. Everything was there for me to embark on such a project.
After doing some research on the Internet, I discovered that hundreds of bikes were 3D printed. Whether by professionals or by makers.
I found myself drowning in countless discoveries, both about 3D printing and about bicycles, an area I thought I knew well.
From the American brand Superstrata Bike, which creates customized SLS-printed frames, to a small German company, Frameone Bike, which develops its printed bikes in small quantities.
All great discoveries, which made me want to find out more.
On the maker’s channel, he has posted a video in which he explains his project after a few months of use, but also shares his documentation.
It was very useful for me to understand the design of the printed parts. But the geometry of the frame was not adapted to the practice I was looking for.
So I turned to the documentation I’d found on the Internet.
Reflection on design
One of my concerns was to choose the right material to use, so as to have a rigid frame that wasn’t too heavy, but also a bike that wasn’t too expensive.
I knew that carbon was a good solution, but I thought it was very expensive and therefore inaccessible for what I wanted to do. But in the end, there are tubes that are sold at decent prices and that are also made in France. This is a very important point for me, because I find it encouraging for these small companies, as well as assuring me of the quality of the carbon.
I thought I’d use a hub with an integrated gear so I wouldn’t have to worry about the design of the derailleur.
Start of design
My first modelling sessions weren’t easy.
Versions through to the final version
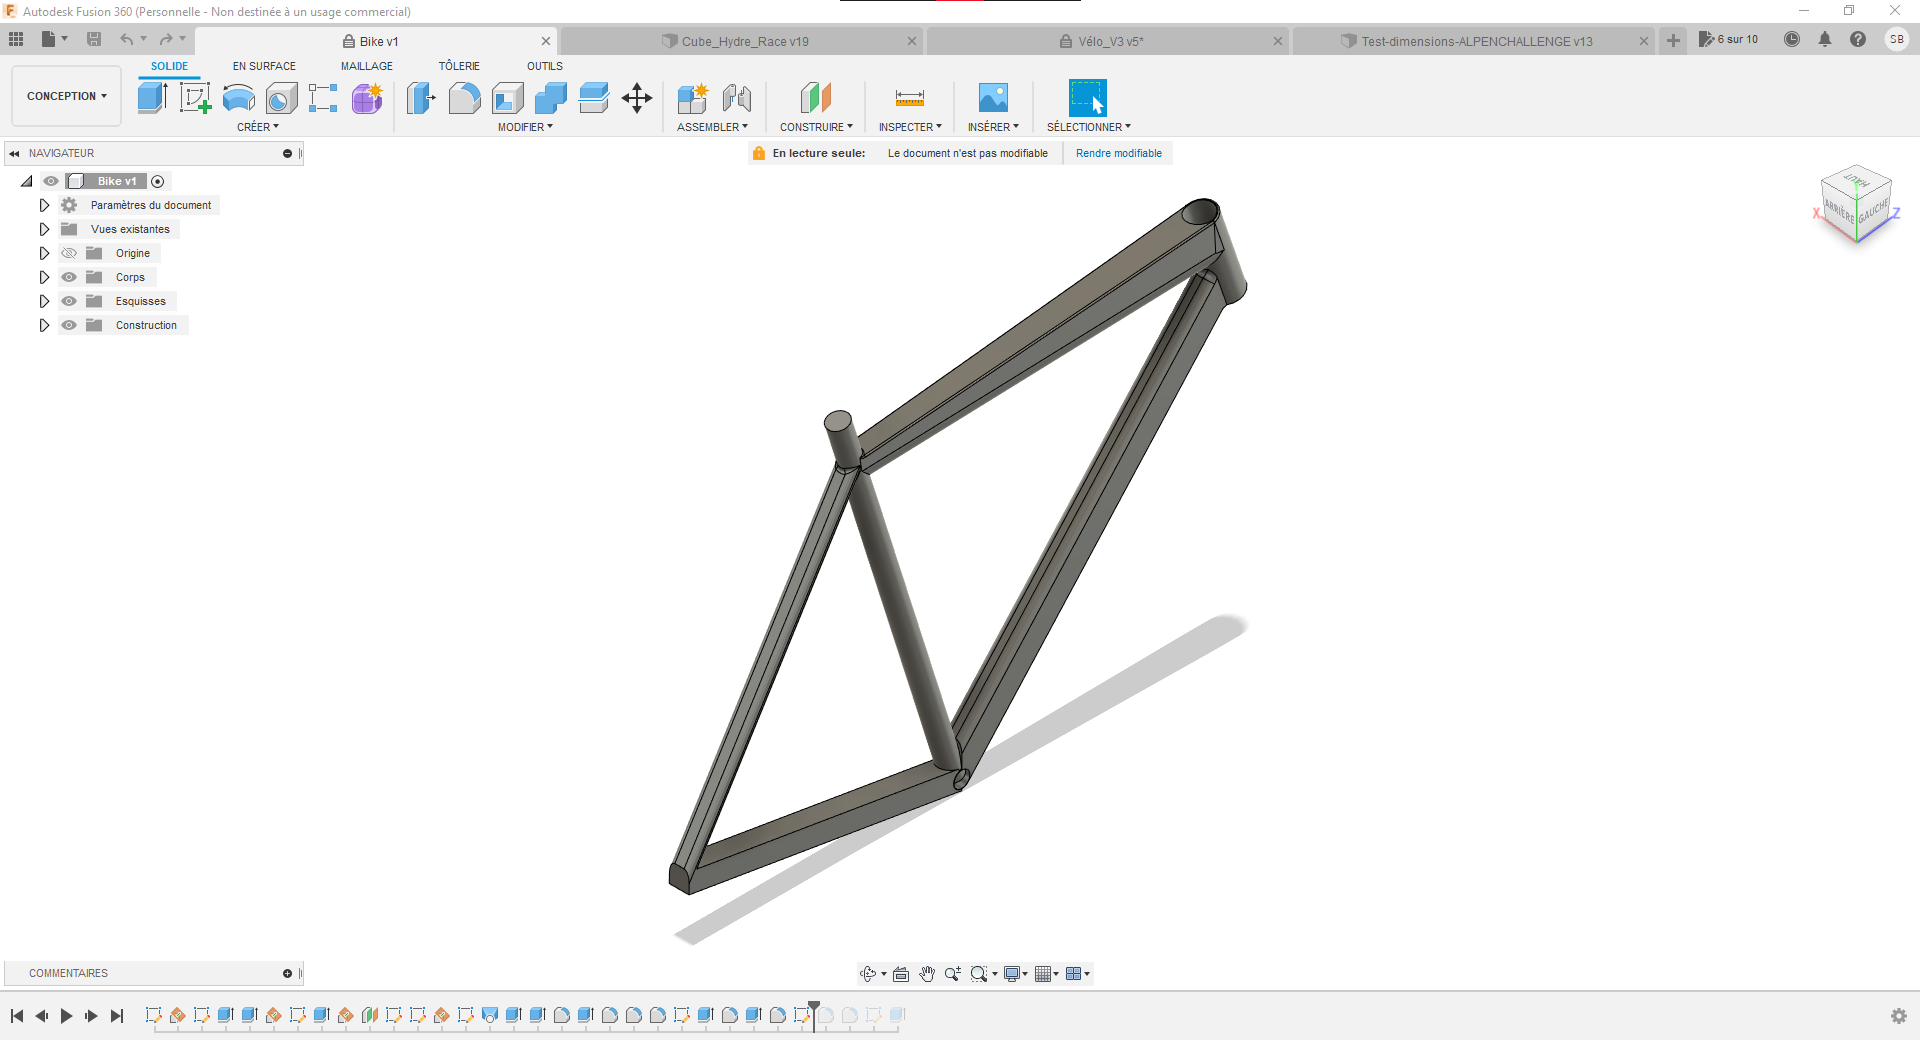
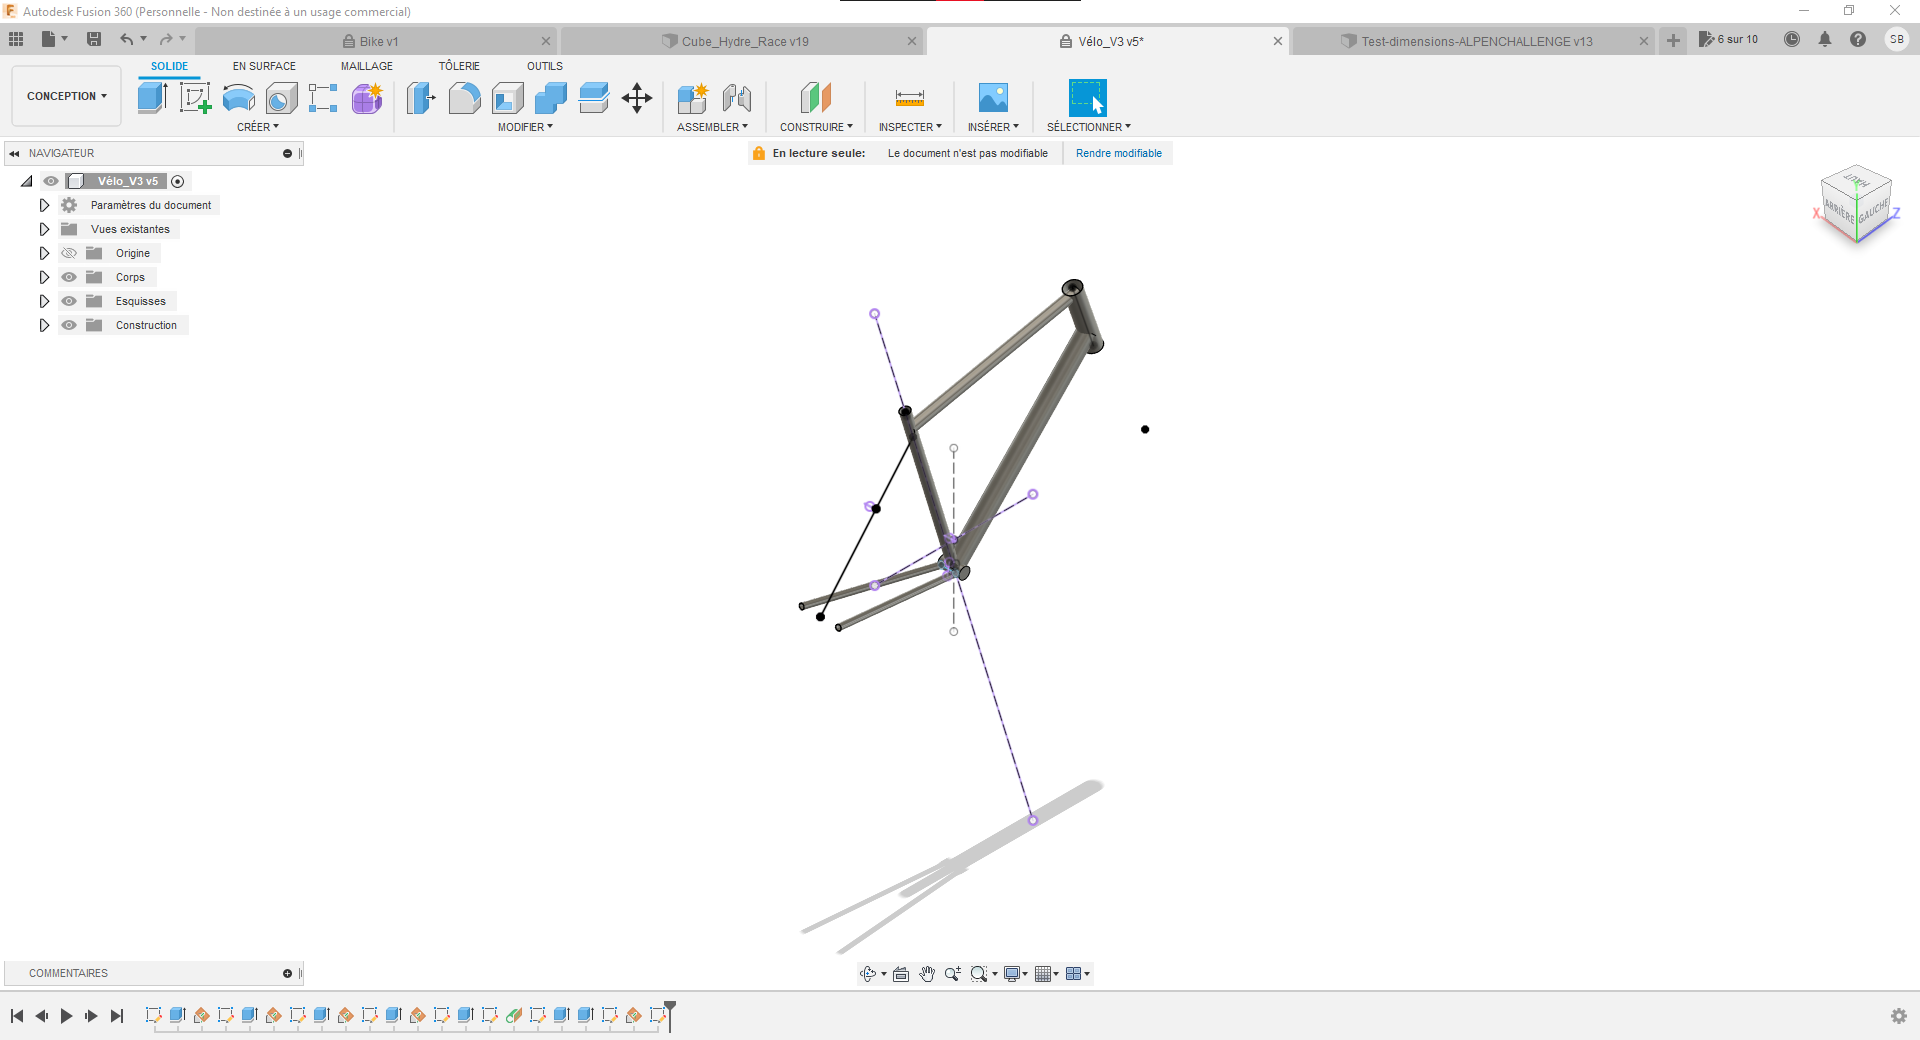
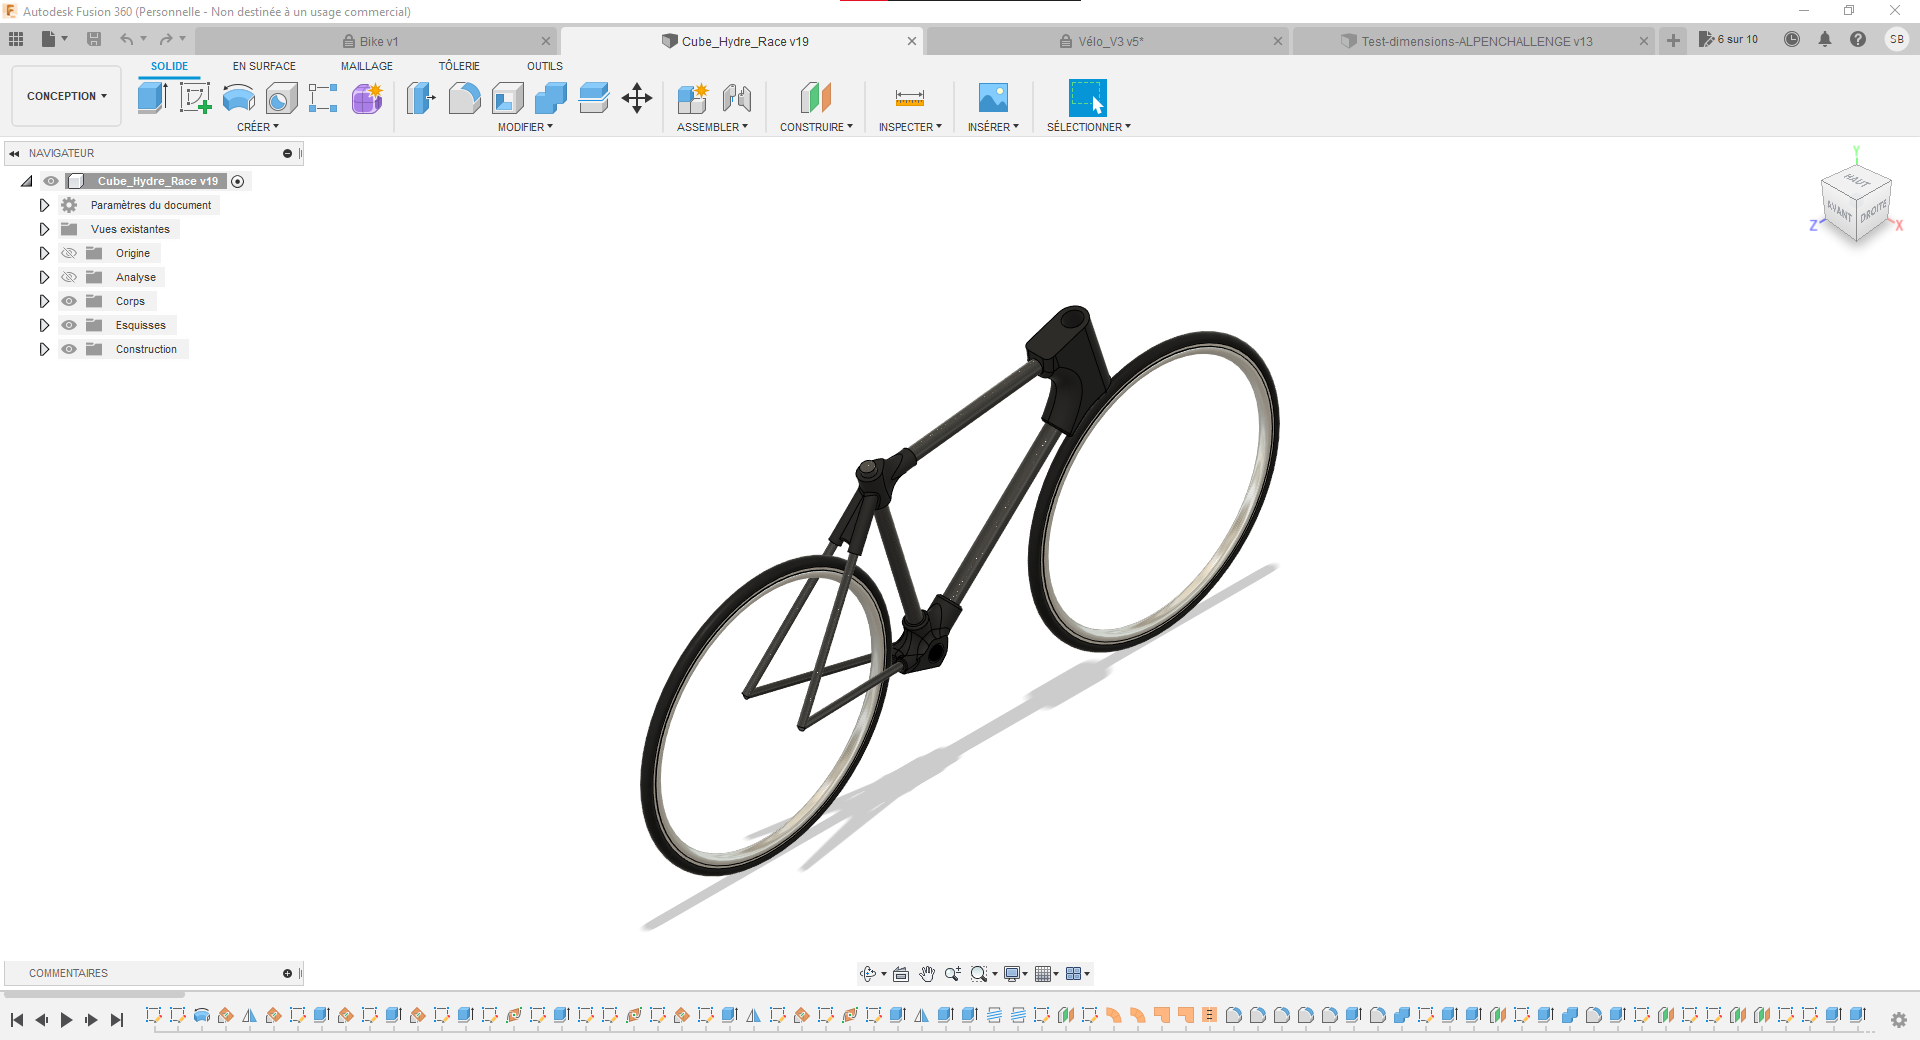
I had a hard time choosing the geometry for my frame, but thanks to a software program, I was able to simulate my bike with the chosen geometry. In my case, I used the 2022 Cube Hydre Race.
BikeCAD on which I produced a detailed drawing with the dimensions of all the parts, as well as the angles and size of the standard parts.
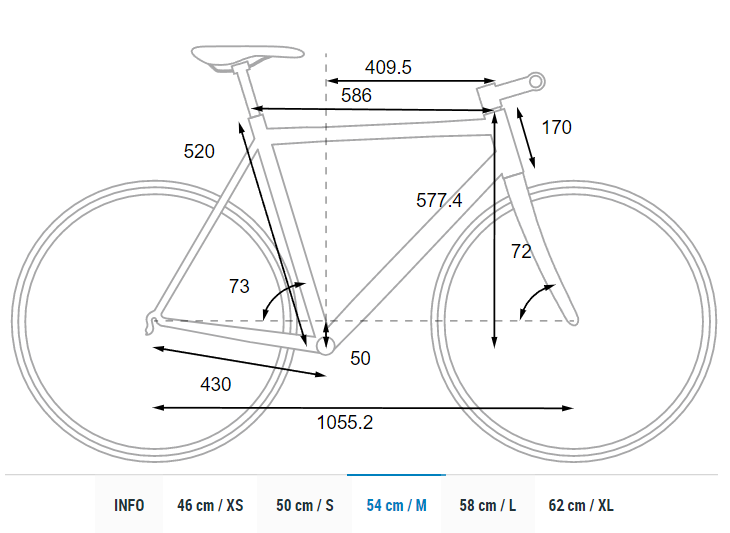
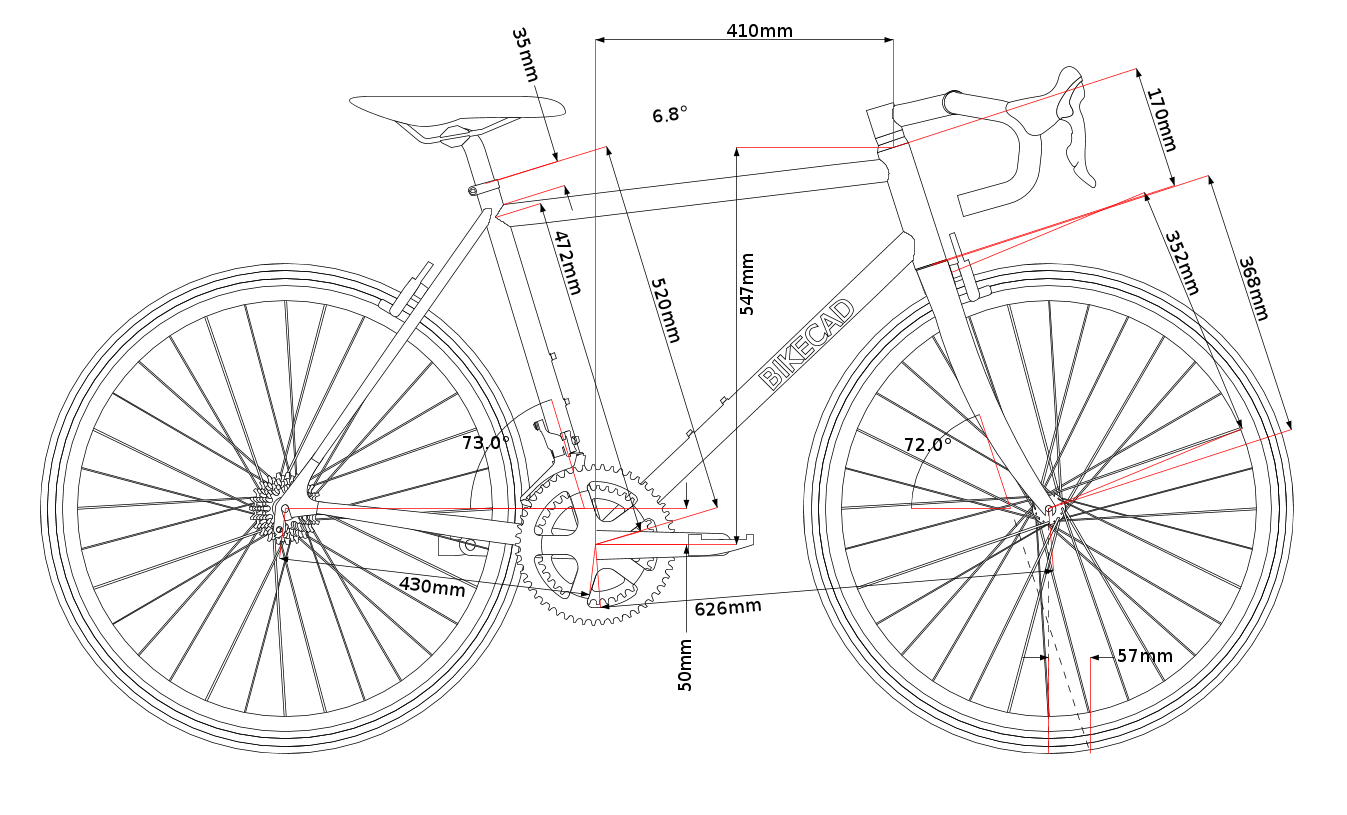
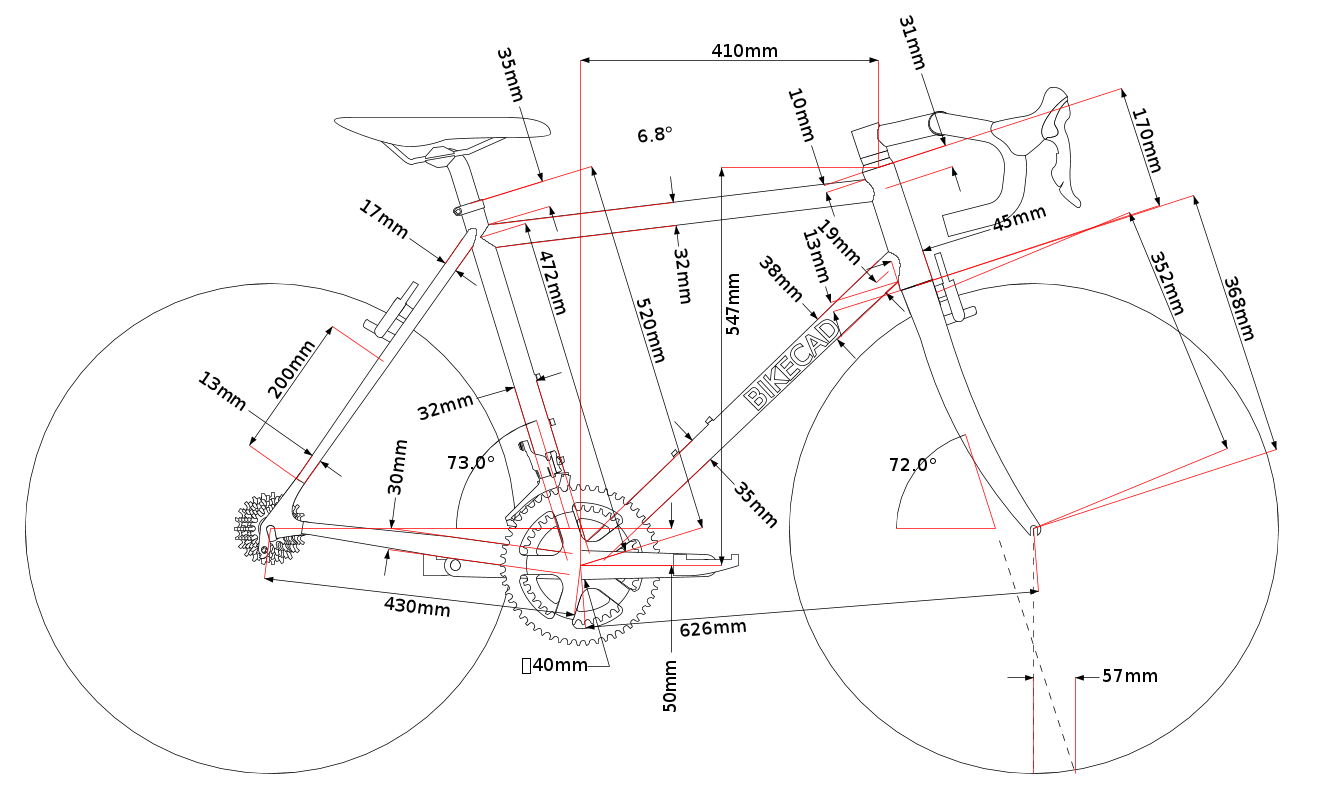
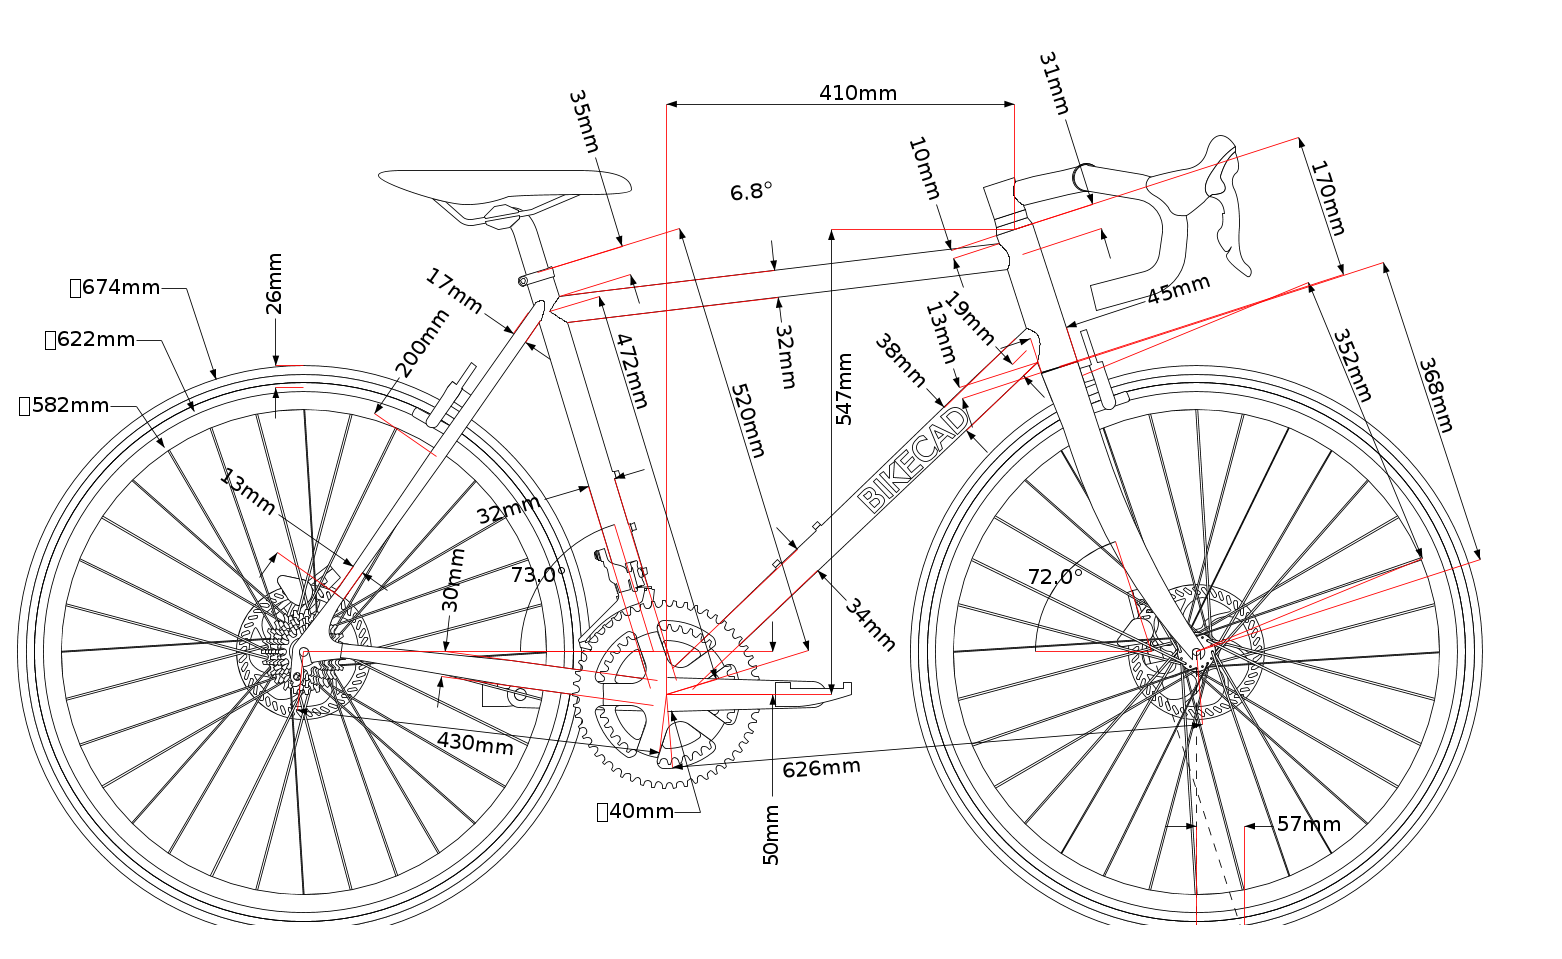
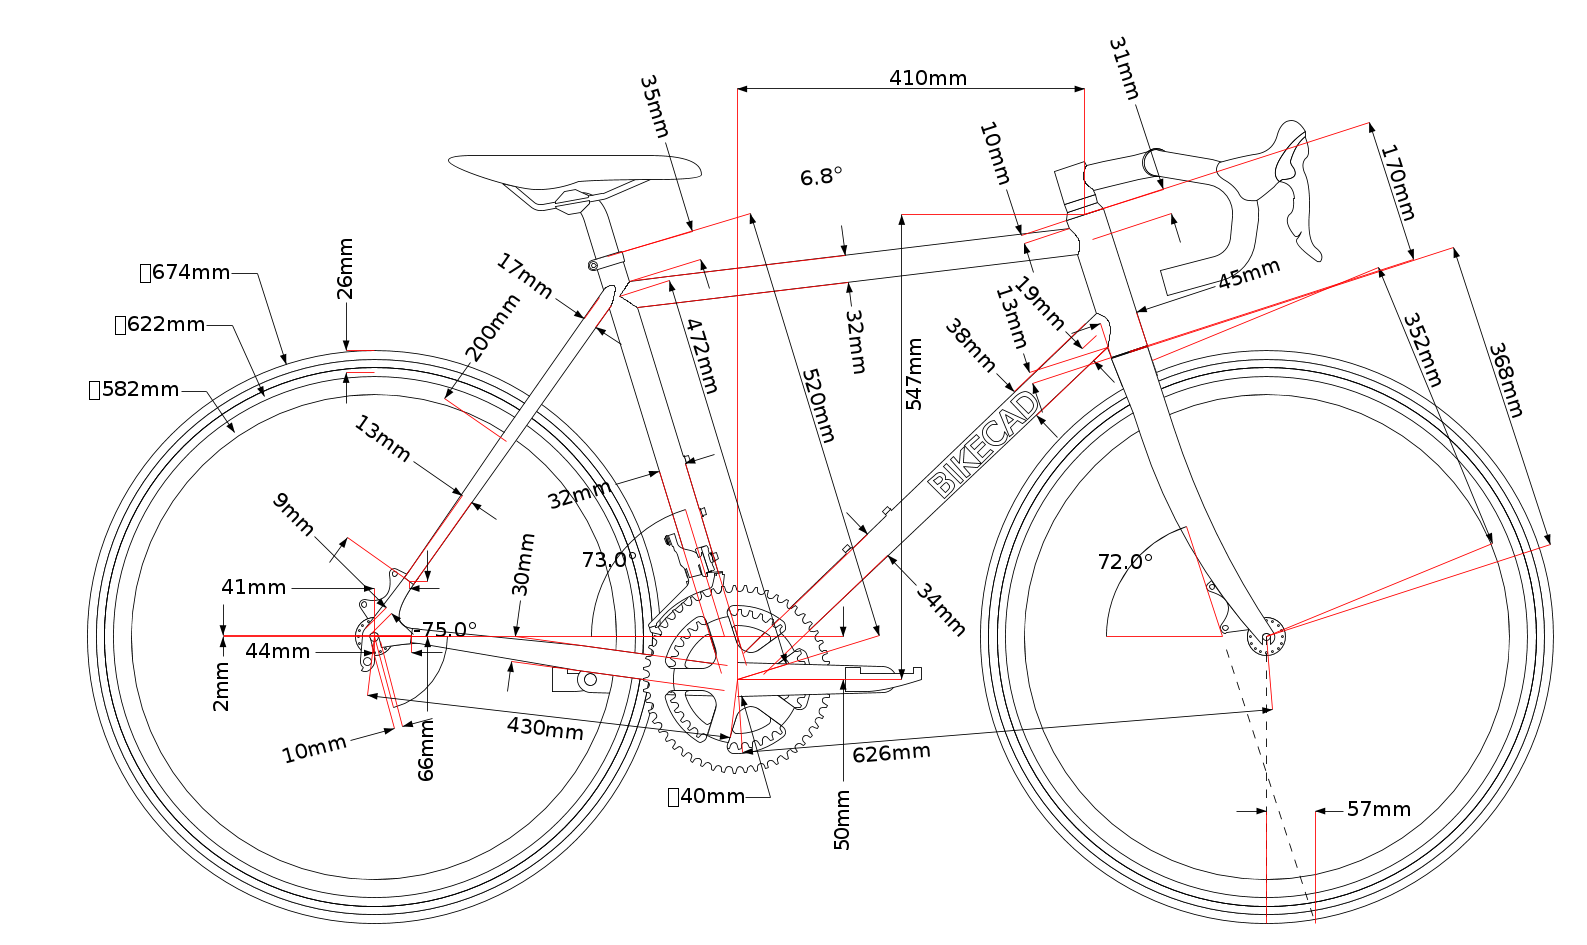
Frame geometry created with BikeCAD software
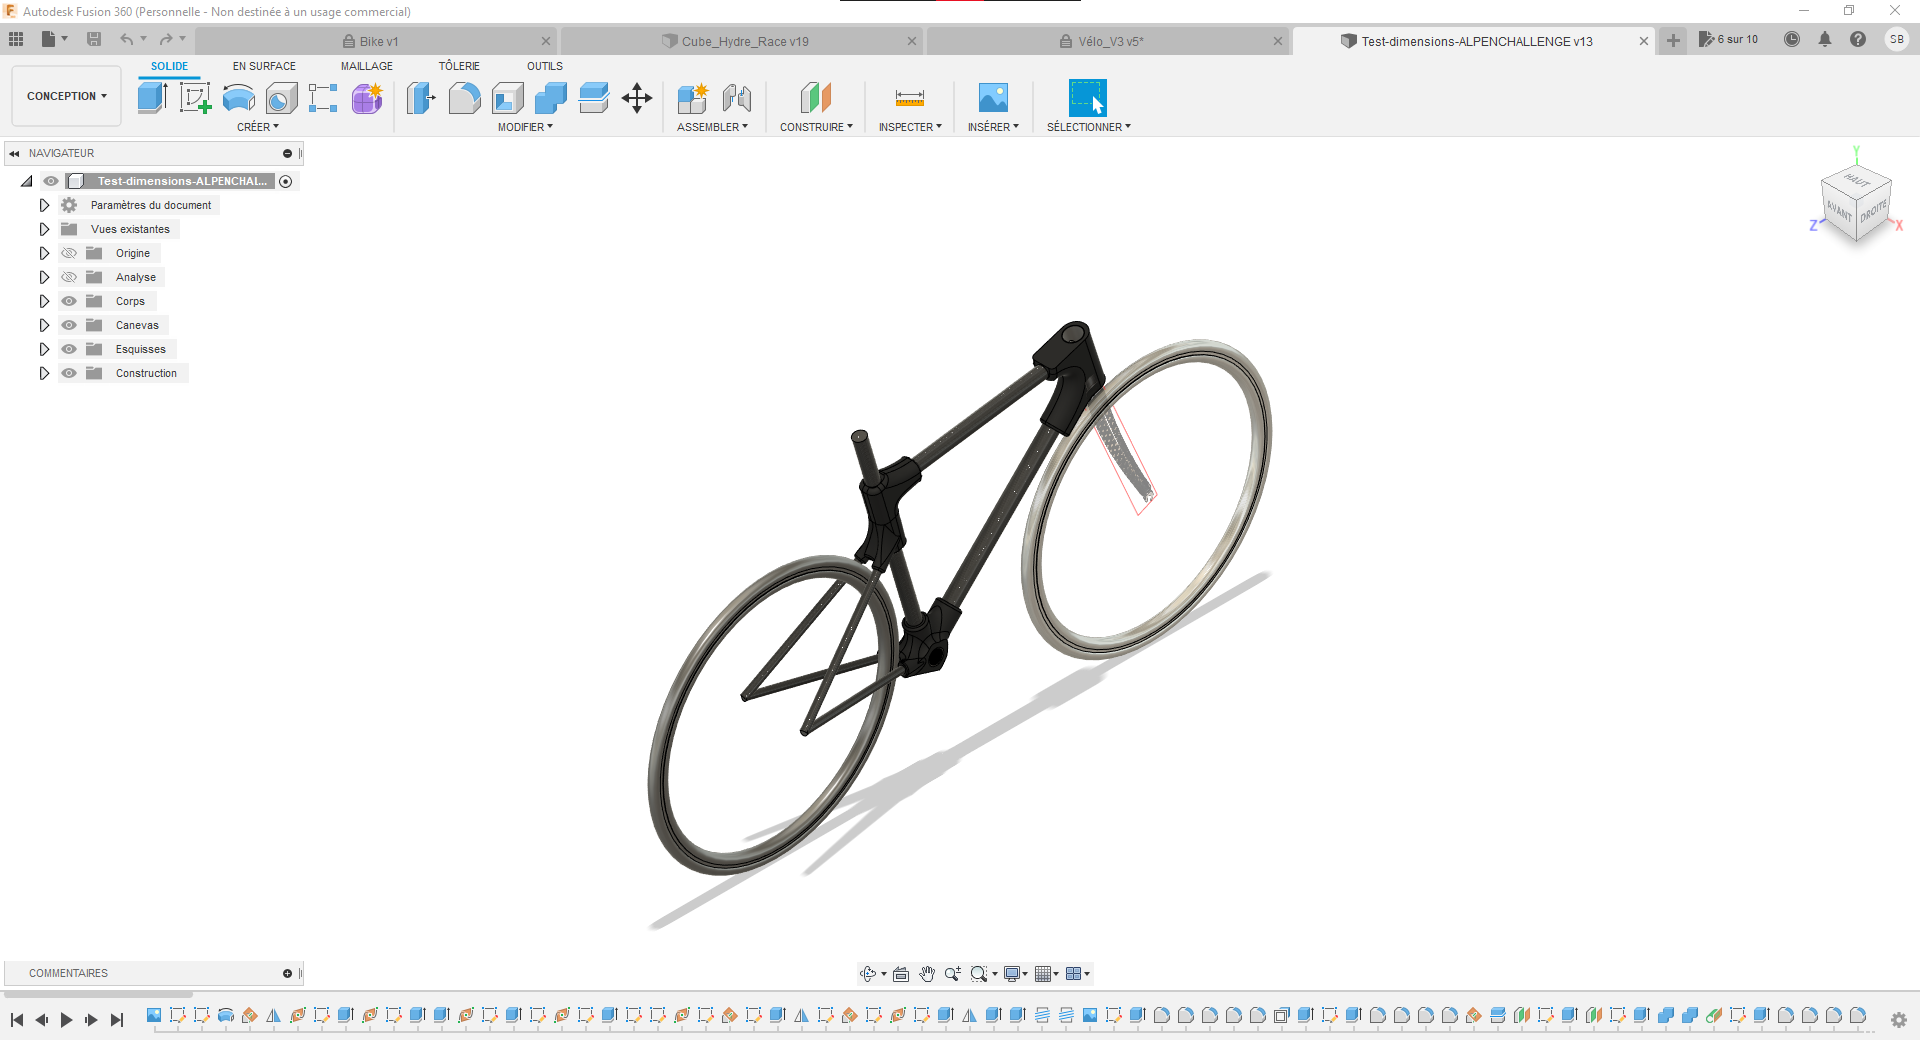
After this stage, I was able to move on to the frame design.
Once the frame had been designed, the tubes had to be connected with parts to be printed in carbon.
This was the most complicated and time-consuming stage, as I was looking for parts that were solid, aesthetically pleasing and printable.
In the way I made the parts, I started by drawing the part and making it aesthetically pleasing. Then I adapt it for printing, so that the angles aren’t too great and there’s a flat base in contact with the printer’s platen.
Material and parts sourcing
Now I need to find the right parts for my bike and make a table with the total cost of the bike.
To start with, I looked into the various brands of filament that make carbon filament to find one that was not too expensive, strong enough and printable with my printer.
I first came across Prusa filament, which is one of the strongest and most reliable on the market. But it’s a bit expensive and requires the temperature of its plate to be raised to 110°C.
So I opted for ColorFabb filament, which costs around €60 per kilo. What’s more, in the presentation of their product, they themselves created their bike in 3D, so that validated my choice of this filament.
I then made a table with the price and quantity of each component. Displayed below.
Little update
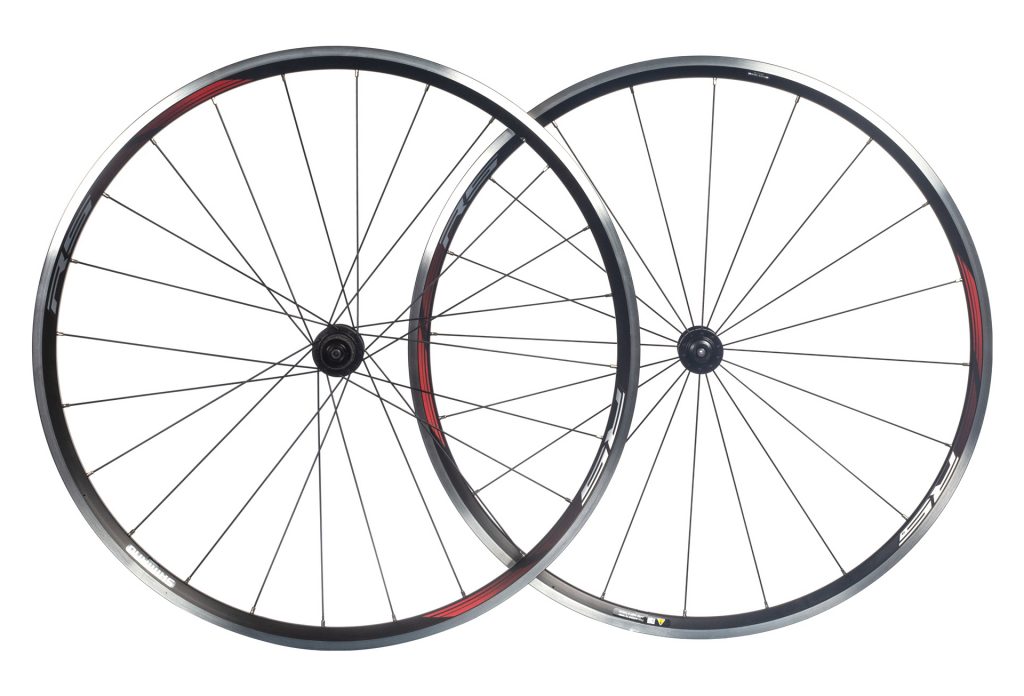
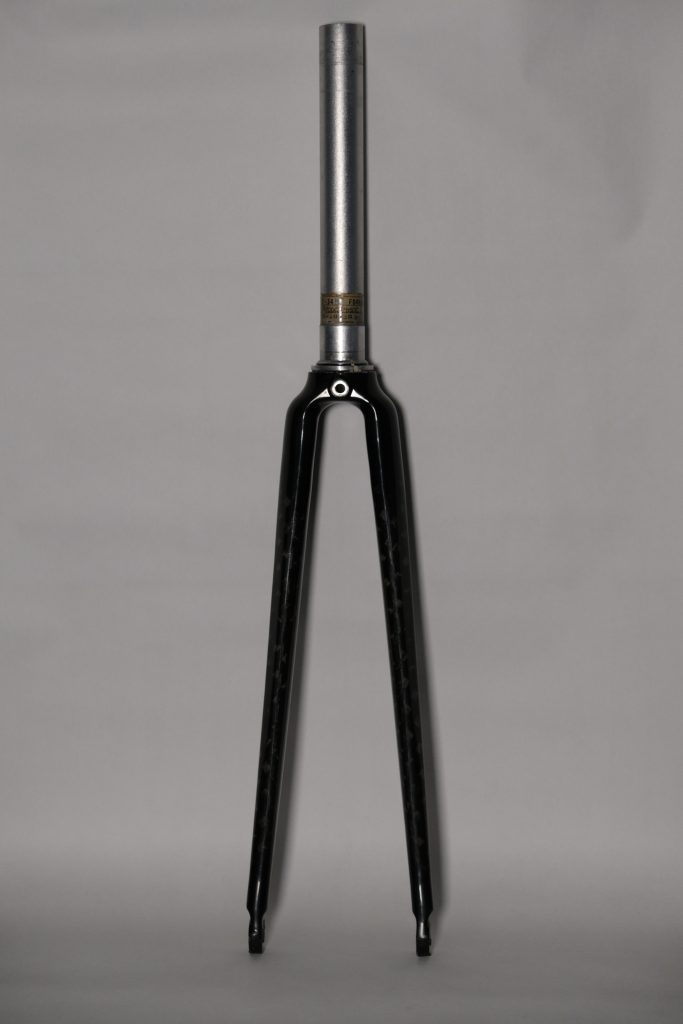
I recently started buying parts. I started with a road-type fork found on Leboncoin and was then offered a set of wheels. I also printed out the bike in 1/10 size to get an idea of the final result of my model. This allowed me to make a few aesthetic modifications. However, I’m still missing the two rear legs, so I can’t model the parts in 3D.